Last updated on: April 23, 2022
Method Statement for Interior and Exterior Lighting System Installation | Interior Lighting System | Exterior Lighting System
In this article today we will talk about the Interior and Exterior Lighting System Installation | Wiring Interior and Exterior Lights | Outdoor Lighting Installation | Indoor Lighting Installation | Outdoor Lighting Installation | Landscape Lighting Installation | Interior and Exterior Lighting Methods | Method Statement for Interior and Exterior Lighting | Lighting Installation Procedure
Method Statement for Interior and Exterior Lighting System Installation:
1. Purpose:
This method statement describes the activities and procedures involved in the system:
Installation and connection of all Interior and Exterior lighting systems, lighting control devices and wiring devices according to the approved shop drawings, project specifications and other related codes. Co-ordinate the exact location and position of all lighting fixtures, switches, outlet boxes and connection to BM8 system as per Architectural, Mechanical and Structural drawings. Wiring Interior and Exterior Lights
2. Scope:
This method statement defines the responsibilities and describes the activities and general
procedures for the following: Wiring Interior and Exterior Lights
- Installation of Lighting System for Interior and Exterior, lighting control devices and wiring devices according to approved shop drawings, technical specification & other related codes and reference standards.
- Coordination of the exact design layout, fixture layout and its installation, positions of
fixtures and wiring devices, ducts, pipes, other installations and ceiling panels / tiles. - This procedure shall be applied to the inspection, method and criteria for installation work carried out by the Electrical Department.
- This Method of Statement covers the procedure pertaining to the installation and inspection activities for Interior & Exterior Lighting unit systems and Lighting control devices. Wiring Interior and Exterior Lights
3. Reference:
- Shop drawings
- Specification
- Material submittal
- Project Quality plan
- Project HSE Plan
- Civil Defense Approval Wiring Interior and Exterior Lights
4. Material and Equipments:
The Following tools shall be arranged before starting the job.
Tool Box. Wiring Interior and Exterior Lights
- Mini Hacksaw Frame with Blades
- Choke Lime Powder with sufficient length of Thread
- Measuring Tape
- End Cutter
- Ladder / Scaffolding
- Manual Auger Bit
- Hammer
- Drill M/C portable hand tools
- Grinding M/C
- Spirit level & water level
- Step ladder
- Centre punch
- Wooden hammer
- Electrical drill (only for surface installation works)
- Diagonal- cutter pliers
- Shank screwdriver Wiring Interior and Exterior Lights
Safety requirements tools such as safety shoes, safety helmet, safety glasses, fluorescent vest, and safety gloves to ensure maximum ability of safe work and dust mask when require
5. Procedure:
5.1 Safety:
- Ensure only trained Authorized & licensed persons only shall operate the power tools and
do the Installation and Testing job. - All hand tools and power tools shall be good in quality and working condition.
- Personal Protective Equipment ( PPE) required varying type of works.
- Where utilized, scaffold shall be inspected, certified and tagged according to scaffolding
procedure. Landscape Lighting Installation - Safety sign board, barricades shall be erected to the working areas if required.
- Necessary PPE to be worn while working in energized to be worn while working in
energized circuits. Ensure adequate lighting is provided in the working area at night time
and if inside the building area to be well illuminated. - Ensure service area/work area openings are provided with barricade, tape, safety nets and warning signage to be provided.
- Calibrated Instruments only to be used.
- Power supply used to take temporary power supply shall not have any joints.
- Ensure LOTO procedure to be followed and implement comprehensive logout & tag out
during execution of work. Outdoor Lighting Installation
5.2 Work Sequence and Methodology:
- Check all material delivered to site is inspected properly by QA/QC Inspector and check if it is stored properly as per manufacturer’s recommendations.
- MIR shall be raised for the inspection of materials received at site to the Consultant
Engineer. Outdoor Lighting Installation - Work shall be carried out by the site staff under strict supervision and guidance of the
concerned Supervisors/ Foremen / Engineers. - The QA/QC Inspector shall check all the installations as per the Installation Check list.
- MIR shall be prepared by QA/QC Inspector and will be submitted to Consultant for their
inspection and approval. Landscape Lighting Installation - QA/QC Inspector shall coordinate with other contractors and arrange inspection for
installation to the Consultant Engineer. - QA/QC Inspector is responsible for all installation activities for getting the work inspected and approved by Consultant Engineer.
5.3 Handling and Storage:
- On receipts of the material at site, necessary precautions shall be taken for unloading,
shifting and Storage, as follows: Outdoor Lighting Installation - On the floor, the units will be stored in a clean, dry place and adequate covering by
tarpaulin sheets will be done to protect the wire/ cable from disposition of construction dust till it is finally shifted to its location. - All Material received will be checked to ensure that they are complying with the approved material submittals in terms of their make, model, type, capacity, etc.,
- Any discrepancy or damages etc., it will be notified and reported immediately for further
action. It should be noted on the carrier’s freight bill. Damage claims should be filed with the carrier immediately. Landscape Lighting Installation - Material found not suitable for site use will be removed immediately from site and the same will be replaced by correct equipment.
- Site Engineers have to ensure that all material used at site are of free from any damages or deformities of any kind. Units found not suitable for site use will be removed immediately and the same will be replaced by correct item.
- End of cables shall be sealed to prevent ingress of moisture.
- Each cable drum shall be provided with appropriate weatherproof metallic label indicating project name, order no., type, size and length of the cable delivered
- The reels for small building wires shall be provided with appropriate tags indicating at least the type, size and length of wire delivered.
- Luminaires, lamp and accessories shall be delivered to the job site wrapped in protective
covering and stored in a dry location free from dust or water and in such a manner to permit easy access for inspection and handling. Luminaires, Lamps and accessories shall be handled carefully to prevent damage. Outdoor Lighting Installation
6. Interior Lighting Installation:
6.1 Pre-Installation:
- All interior lighting fixtures shall be UL listed and comply with the requirements of ANSI,
NEC and SASO. - Ensure that all relevant documents have been approved by Client Engineer prior to
commencing installation, and that the latest revisions of shop drawings, specifications
including approved procedures are distributed to concerned personnel who will carry out
the work. Outdoor Lighting Installation - Ensure that all personnel are qualified to perform the work and are fully familiar with all the tools and equipment’s to be utilized.
- Check materials for damage before transporting to the work area. All materials of
unapproved/damage condition or low quality shall be immediately segregated from the job site to a quarantine area. Landscape Lighting Installation - Reflected ceiling plans are to be checked to ensure exact positions of fixtures with respect to structural members, ducts, pipes, other installations and ceiling panels/tiles, where required.
- Conduit / wire way installation shall be complete between lighting fixtures, control
Switches, junction boxes, electrical cabinet and splicing points prior to the installation of
conductors. - Verify that bushings are installed in each junction box, pull box and electrical cabinet prior to cable pulling. Indoor Lighting Installation
- Check the conductors installed are as per approved drawings and correct cable type, size
and color coding has maintained. - Daily housekeeping shall be conducted after work, especially to remove left-over materials from the work area. Landscape Lighting Installation
- Coordination shall be done with other disciplines prior starting any installation.
- Check the availability of materials at the site before installation.
6.2 Installation:
- Ensure fixtures level are installed, aligned and parallel or square to building lines at uniform heights as shown on the approved shop drawings and final height adjustments are made prior to the installation. Indoor Lighting Installation
- Ensure that nameplate details, numbers of circuits and panel board location, elevation
are in accordance to shop drawing & Project requirements. - Provide fixtures/ fixture outlet boxes with hangers, brackets and flanged bolted fittings, to support weight of fixture. Fixtures to be mounted on outlet boxes to fixture studs.
- Provide one point of support in addition to the outlet box fixture stud for individually
mounted fixtures longer than 600 mm. - Provide two stem hangers for individually mounted pendant fixtures. Stems are to have
suspension aligners and are to be of suitable length for suspending fixtures at required
height. Landscape Lighting Installation - For Suspended ceilings: provide suspend fixtures directly from building structure.
- For Solid ceilings: Coordinate dimensions of recesses in ceilings with exact fixture
dimensions and structural elements. - Ensure that fixtures are arranged in continuous rows with minimum spacing between
- Fixtures so that individual fixture can be removed without dismantling remaining fixtures.
- Cover plates are to be installed over fixture outlet box or opening in ceiling or
- Metal frames of the lamps are to be earthed properly.
- Install flush recessed fixtures to completely eliminate light leakage within fixture and
between fixture and adjacent finished surface. - After fixtures are installed ensure that ventilation channels are kept free prior to the
requirement of fixture design. Landscape Lighting Installation - Ensure that enclosed fixtures are installed with reasonably insect/dust tight, and
- Complete weather-proof are installed for weather conditions.
- Place new lamps in fixtures immediately prior to handover. Lamps used for temporary
services are not to be used for final lamping of fixtures. - Lamps in each fixture are installed with set level, plumb, square with ceiling and walls in
accordance to manufacturer’s instruction and approved material submittals. - Supports for fixtures in or on grid type suspended ceilings:
- Install a minimum of four ceiling support system rods or wires for each fixture.
- Locate not more than 150 mm from fixture corners.
- Support clips: Fasten to fixtures and ceiling grid members at or near each fixture corner.
- Clean fixtures internally and externally after installation. Indoor Lighting Installation
6.3 Testing:
- Perform Illumination level test to determine level and uniformity at selected locations.
- Perform Operational test for each fixture after installation.
- Perform electrical supply interruption demonstrate proper operation of emergency lighting. Indoor Lighting Installation
- Perform Insulation resistance and continuity test for each circuit and circuit breaker for
equipment before Energization. - Perform operational test for all circuit breakers and control gears with lamps
Installed. - Proper type, size, colour and number of wires and cable are being installed.
- Test results are to be recorded on site. Lighting Installation Procedure
7. Exterior Lighting Installation:
7.1 Pre-Installation:
- The exterior and street lighting fixtures shall be UL listed and comply with applicable
- Requirements of ANSI, NEMA, A8TM, NEC, IEC.
- Ensure that all relevant documents have been approved by DAR Engineer prior to
commencing installation, and that the latest revisions of shop drawings, specifications
including approved procedures are distributed to concerned personnel who will carry out
the work. Lighting Installation Procedure - Ensure that all personnel are qualified to perform the work and are fully familiar with all the tools and equipment’s to be utilized.
- Check materials for damage before transporting to the work area. All materials of
unapproved/damage condition or low quality shall be immediately segregated from the job site to a quarantine area. - Ensure that the installation of the support will be checked for rigidity and fixture
- Fixing points are available. Indoor Lighting Installation
- Ensure that the flood light poles, lighting standards and columns will be assembled
as per the manufacturer’s instructions and inspected to ensure all accessories are fitted and securely fixed. - Ensure that the conductors, warning tapes installations were done as per approved shop
drawings and project specifications. - Ensure the conductors installed are of correct size and proper color coding has maintained. Landscape Lighting Installation
- Daily housekeeping shall be conducted after work, especially to remove left-over
- Materials from the work area.
- Coordination shall be done with other disciplines prior starting any installation.
- Check the availability of materials at the site before installation.
7.2 Installation:
- Ensure equipment’s are installed to be readily accessible for operation, maintenance and
repair. Indoor Lighting Installation - Daily housekeeping shall be conducted after work, especially to remove left-over materials from the work area.
- Ensure that Holding down and plumb adjusting nuts, washers, locknuts or nuts are to be
stainless steel or cadmium plated. - Luminaires and supports are to be attached to allow aiming for indicated light distribution. Lighting Installation Procedure
- Floodlights are to be mounted on specially designed brackets to allow swivelling in any
desired direction and locking firmly in final position. - Fasten luminaire to indicate structural supports.
- Tighten electrical connectors and terminals according to manufacturer’s torque. Tightening values. Lighting Installation Procedure
- Clean fixtures internally and externally after installation.
7.3 Testing:
- Perform Insulation resistance and continuity tests are to be carried out on each circuit with circuit breakers in open position and lamps not installed.
- Perform Operational test for all circuit breakers and control gears with lamps installed.
- Voltage at terminals of ballasts are to be recorded on final columns of each circuit and at
distribution panel. Indoor Lighting Installation - Perform Operational test for each fixture after installation.
- Perform Illumination level test to determine level and uniformity at selected locations.
- Perform Earthing resistance tests which includes measurement of earth electrode resistance at final points of circuits and continuity of protective conductors.
- Test normal operation of lighting units after installing luminaires.
- Measure light intensities at night. Use calibrated photometers.
- Ensure Intensity and uniformity of illumination are checked.
- Malfunctioning fixtures and components should be repaired or replaced.
8. Lighting Control Devices:
8.1 Wiring Devices:
- Outlet boxes shall be as per project specification
- Switches shall be as per project specification
- Socket outlet shall be as per project specification
- Plugs and switch disconnect shall be asper project specification
- Special devices such as lighting contactors and Dimmers. Lighting Installation Procedure
8.2 Installation:
- All lighting control devices and components shall comply with the applicable standards of
SASO, NEMA, NEC, B8 and ANSI. Lighting Installation Procedure - Lighting control devices are mounted according to manufacturer’s instructions.
- For suspended devices: Mounting heights are to be bottom of the unit and to centre.
- For wall-mounting devices: Mounting heights are to be centre of unit.
- Install wiring between sensing and control devices according to manufacturer’s instructions.
- Ensure that master selector switch panel comprise set of switch buttons of normally
- Open type assembled in one-unit comprising box and cover with individual switch per
circuit. - Bundle, trail and support wiring in enclosures.
- Ensure Proper Grounding is done for the equipment.
- Tighten electrical connectors and terminals with torque wrench to manufacturers torque
tightening values. Lighting Installation Procedure - Proper identification shall be done to identify components and power and control wirings.
- Clean equipment and devices internally and externally and repair damaged finishes.
- Exact locations of outlets and switching devices are to be determined from interior finishing and detailed approved drawings. Any condition that would place an outlet in an unsuitable location is to be referred to the engineer.
- Locate switches at strike sides of doors.
- Mounting heights for outlet boxes and switches are to be uniform within similar areas.
- Mount lighting switches at 1350 mm (100mm from door frame, horizontally) and socket outlets at 300 mm from finished floor level respectively. Mount switches with long dimension vertical and operating handle, if of toggle type up when in on position.
- Make neat openings for recessed outlet boxes allowing for thickness of finishing and use extension rings if required.
- Install exposed boxes and plates plumb, square and parallel to finished wall surface.
Exposed plates covering recessed boxes are to rest neatly on wall surface without gaps
and fully covering the box. - Grouped outlets are to be arranged neatly so that use of fittings is convenient and clear.
- Water and explosion proof fittings shall be installed securely to achieve required degree of protection. Interior and Exterior Lighting Methods
- Where appliance is designed to adapt directly to outlet box, extend wiring to incoming
terminals inside appliance. - Where appliance is not designed to adapt to outlet box, install connecting wiring in flexible conduit firmly fixed to outlet box cover plate and to terminal box on appliance.
- Where three or more switches are ganged, identify each switch with approved legend
engraved on wall plate. - Receptacles should be identified by panel board and circuit number from which served.
- Use machine printed, pressure sensitive, abrasion resistant label tape on face of plate and durable wire markers or tags within outlet boxes. Interior and Exterior Lighting Methods
8.3 Connection:
- Single pole switches are to switch the phase wire.do not run neutral wire through switches having neutral shunt or bridge. Interior and Exterior Lighting Methods
- Exposed outlet boxes should be securely fastened to wall with machine screws.
- Tighten electrical connectors and terminals as per manufacturers torque tightening values using torque wrench.
- Internally clean devices, outlet boxes and enclosures. Replace stained or improperly
painted wall plates or devices. Interior and Exterior Lighting Methods
8.4 Testing:
- Perform Continuity and operational tests of circuits.
- Settings of photoelectric devices with photometer are to be verified.
- Perform Operational tests to set and operate devices to demonstrate their functions.
- Perform testing of devices under conditions that simulate actual operational conditions.
- Control settings, operations, cues and functional observations are to be recorded.
- Visually inspect fittings and equipment’s for fixing and workmanship.
- Megger tests are to include switch and socket outlet test together with insulation resistance of wiring installations. Interior and Exterior Lighting Methods
- Devices are to be tested for operation and are to perform as intended at full load without
any signs of heating. Interior and Exterior Lighting Methods - Equipment is to be insulation tested and observed under full load for not less than 3 days’ operation, with respect to undue heating and performance in general.
OTHER POSTS:
-
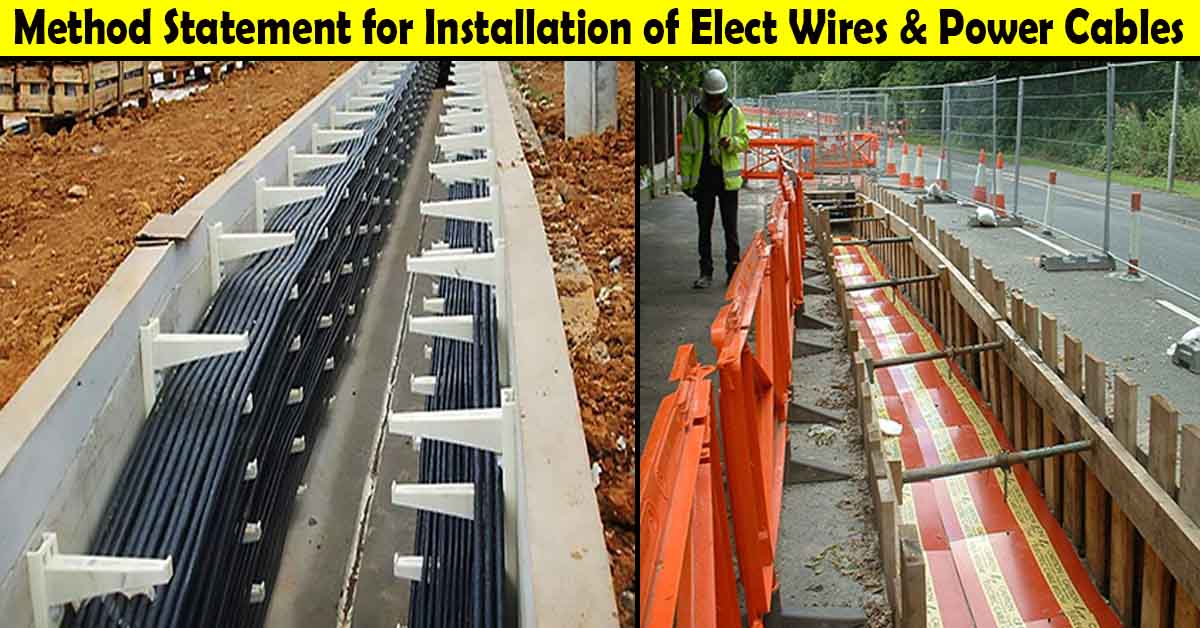
Method Statement for Electrical Wires and Power Cables Installation
-
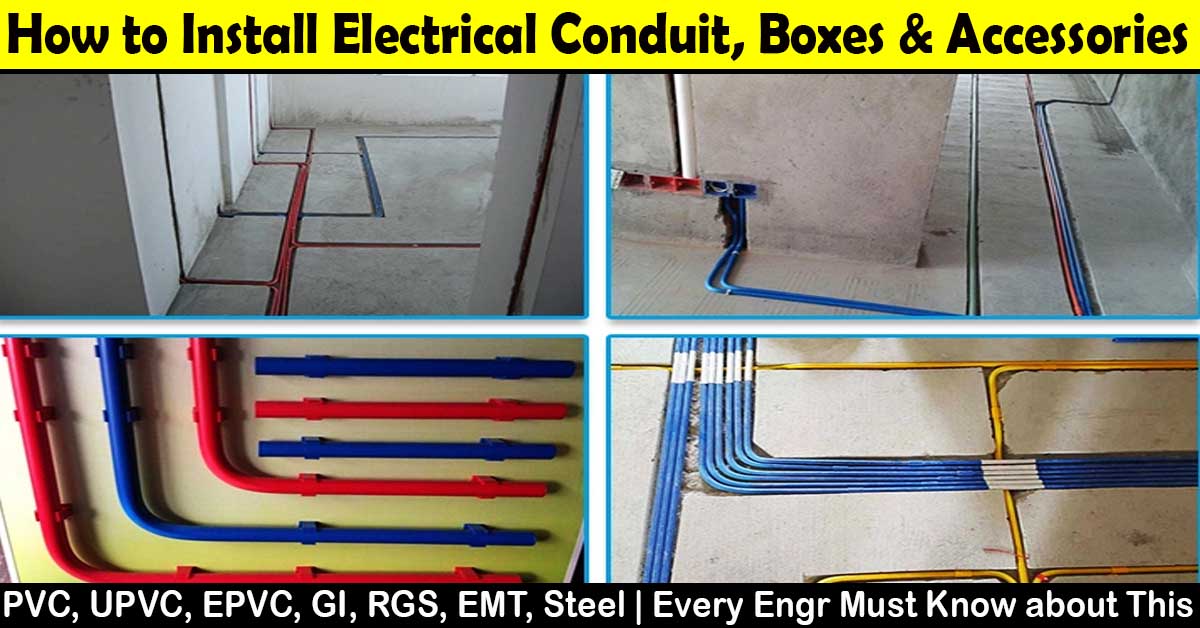
Method Statement for Installation of Electrical Conduit and Boxes
-
Method Statement for Interior and Exterior Lighting System Installation
-
Method Statement for Installation of Cable Tray or Trunking
Conclusion:
Full article on Interior and Exterior Lighting System Installation | Wiring Interior and Exterior Lights | Outdoor Lighting Installation | Indoor Lighting Installation | Outdoor Lighting Installation | Landscape Lighting Installation | Interior and Exterior Lighting Methods | Method Statement for Interior and Exterior Lighting | Lighting Installation Procedure. Thank you for the full reading of this article in “QA QC in Construction” platform in English. If you find this post helpful, then help others by sharing it on social media. Please share this article on social media for future uses.